Introduction
This blog article is one of a series of articles by Priocept that provide introductory training material for the Magnolia CMS system. There are further articles on Magnolia and training; see also Getting Started with Magnolia CMS.
Before attempting the exercise below we recommend you understand the concept of separate Magnolia instances for authoring and editing.
This example follows a site editor making minor changes to a page in a Magnolia CMS website and a site publisher reviewing that change before publishing it for public viewing. It uses the Magnolia CMS Demo Area, hosted by Magnolia International to provide an area for exploring and practising. Because this website is publicly accessible some text and pages may appear differently to how they do below. Should the website appear completely different, it will be restored to its original state in no longer than thirty minutes. The demo site is available at:
This example uses one editing user for editing tasks and one publishing user for approval tasks. The editing username is “eric” and the publishing username is “peter”. Their passwords are the same as their usernames.
Please note that because this site is refreshed every thirty minutes, it may become unavailable while you are working. It will be restored very shortly after becoming unavailable but your changes will be lost.
At any point you can view the state of the public site at the address above.
Publishing Steps
Logging In
When first arriving at the authoring instance, the user is presented with a login screen. This prevents unauthorised editing of pages and also allows Magnolia to build up an audit log recording not just what changes are made but also who they were made by.
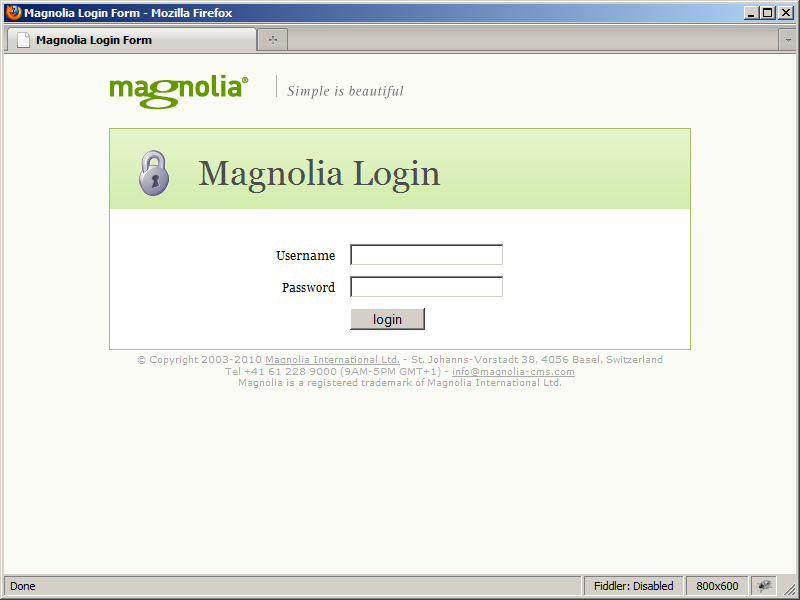
Login using the username “eric” and the password “eric“.
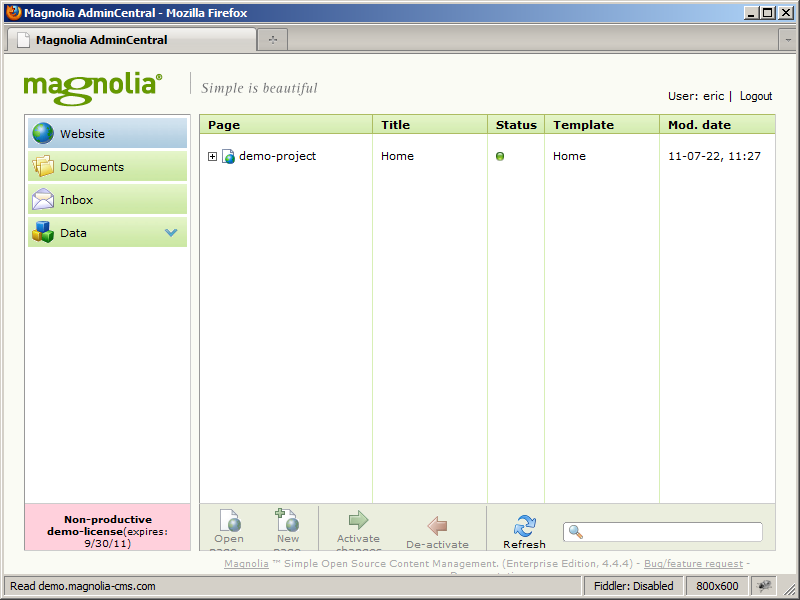
Admin Central
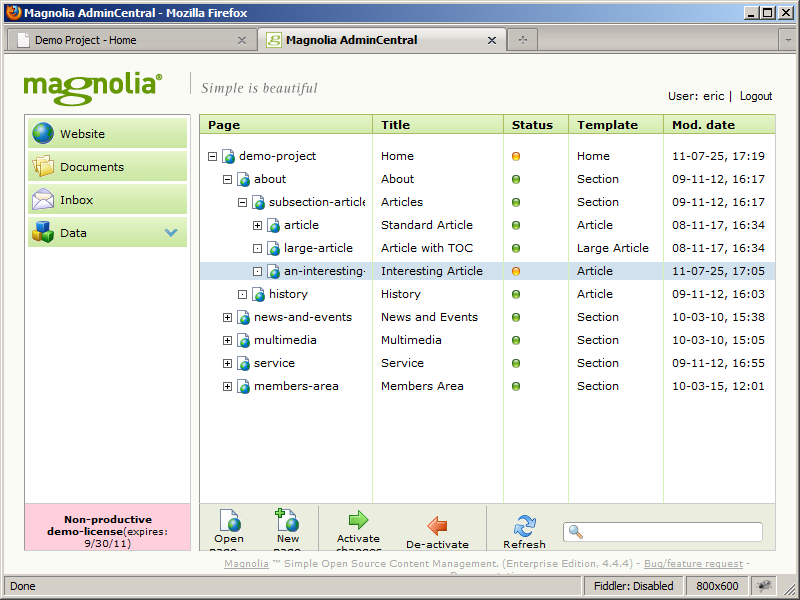
Once logged in, you are presented with a view of Admin Central, the centre of all Magnolia editing activity. The menu on the left hand side provides access to various control areas and changes to provide access to extra modules when these are added. The default view at the top of the menu is the website view which provides access to every page in the website. It is via this view that you will make your text changes.
The editing task in this exercise is to make a very minor change to an article in order to track its progress through the publishing system. To access this article you must navigate to it using Magnolia’s tree structure which uses a tree to represent the pages that make up a site. The tree can be explored by opening and closing branches using the plus and minus signs next to a section name. Explore the tree until you find the articles listed under demo-project/about/subsection-articles.
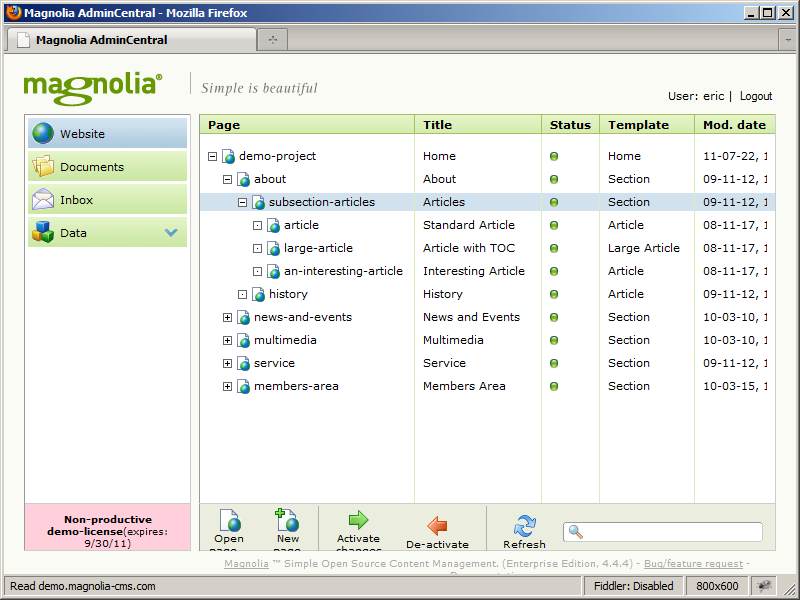
Of interest when looking at publishing is the coloured “lights” next to a page. In the image above, the green lights represents a page unchanged since it was published. Note that currently the entire site has been unchanged since it was last published as all the lights are green.
The page you will be editing is “Interesting Article” but before editing it, preview it to see what it looks like. To launch a preview, right click the page to launch a menu and select “Open page…”.

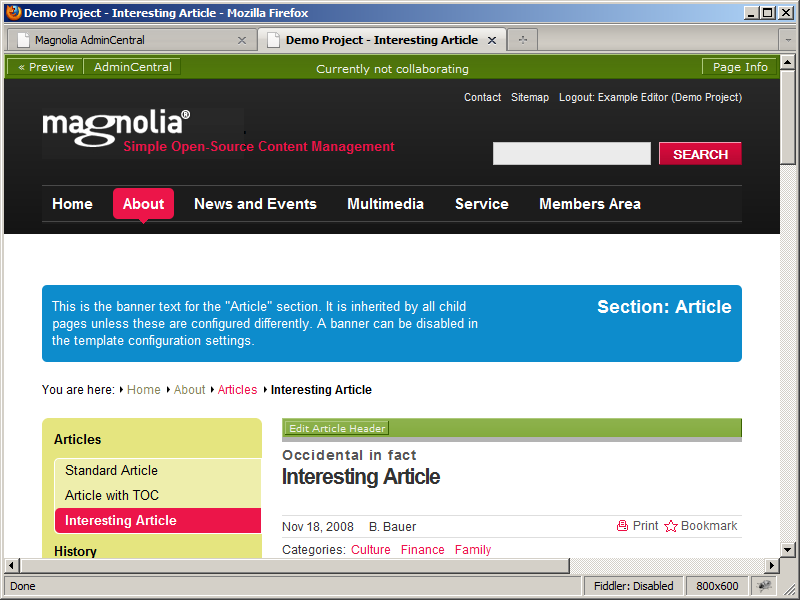
This will open a new browser window or tab showing the page in Edit Mode. Edit Mode shows how the page as it exists on the authoring instance will be served by the public instance after it has been published. The only difference between these two views are the green edit bar controls which are added to the authoring instance’s version of the page.
Edit and Preview modes
Removing these bars and entering Preview Mode is done using the “Preview” button in the top left of the screen. Click this to see the page in Preview Mode and, in a new browser window, compare it to the page version held on the public instance at:
Currently the two pages should be identical and should remain so until the very end of this tutorial.
Editing
Editing of pages is covered in detail in the article A Simple Edit in Magnolia CMS. The purpose of this step is to make a small change in order to have something to publish.
From the current view in Preview Mode, look for the small green arrow button in the top left of the page. This will return your view to Edit Mode and allow you to make a small change.

Once back in Edit Mode, look for the green edit bar above the header “Interesting Article” and click the “Edit” button. This will launch an editing dialog.
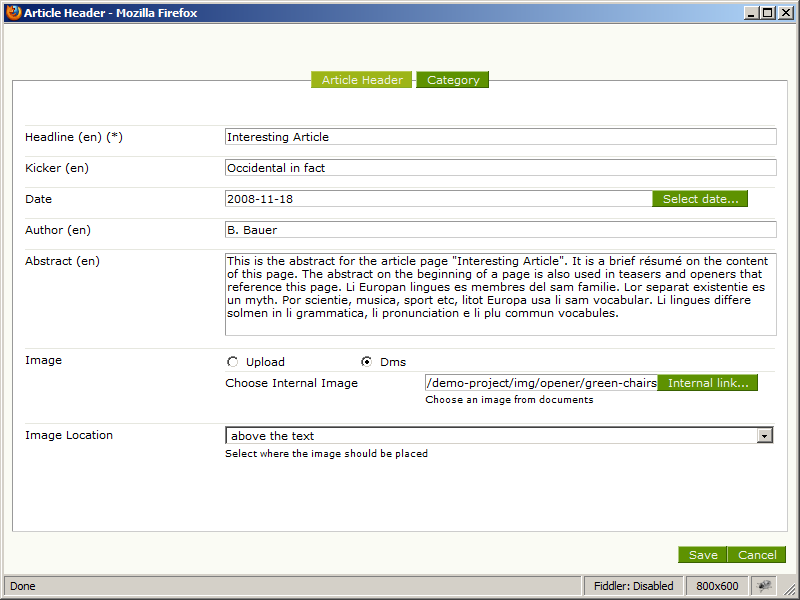
Edit the text in the Headline text box that currently says “Interesting Article” so it says “More Interesting Article” and then click “Save”
The page in edit mode updates to show the change and your editing task is complete. In real-life an editing job may require much more work but this small change is enough for now.
Return from edit mode to Admin Central using the link at the very top of the page.

In the website tree the interesting article page now has a yellow light next to it. This means that Magnolia has recognised the change that has been made and is ready to publish it.
Activate
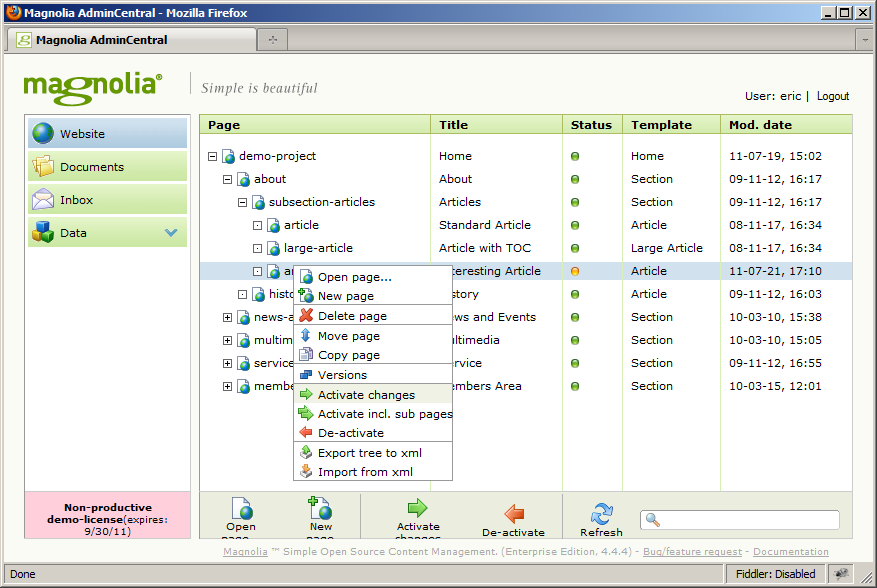
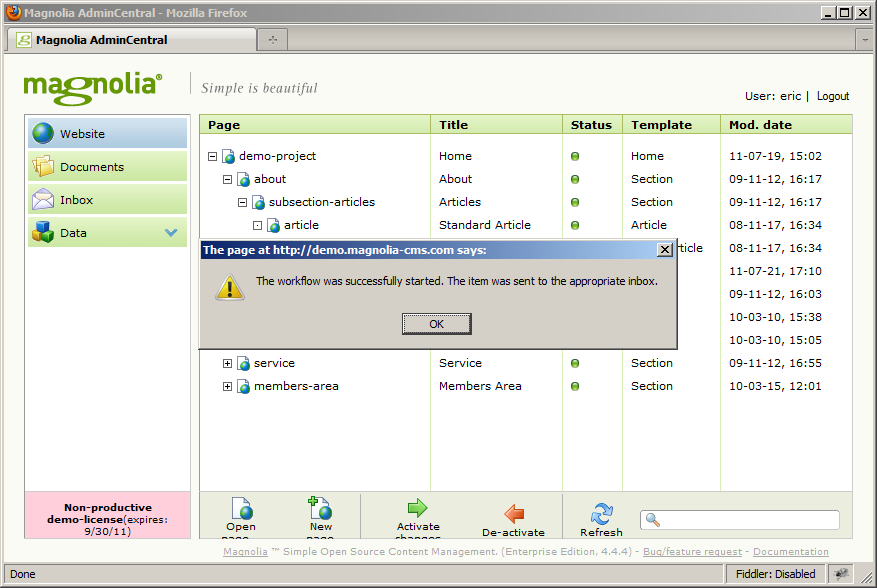
Now that the required changes are complete, the page can be sent for publishing. Right-click on the page again and select the option “Activate changes”.
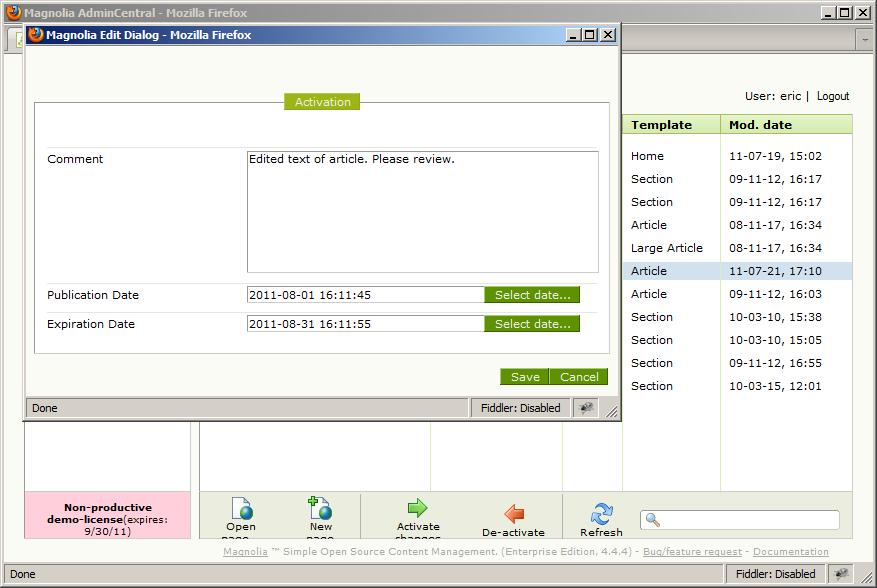
On choosing to activate, you will be presented with a window asking you to leave a note for the publisher user. This allows you to summarise your changes, add a project reference, etc.
Once submitted, you will receive confirmation that your change has been submitted to a publisher and your work is complete.
Preview
We now change our focus to Peter, a publisher.
The change submitted as Eric is in the system waiting for a publishing user to approve it. If you check the article as it appears on the public instance you will see that the change you made has not yet had any affect.
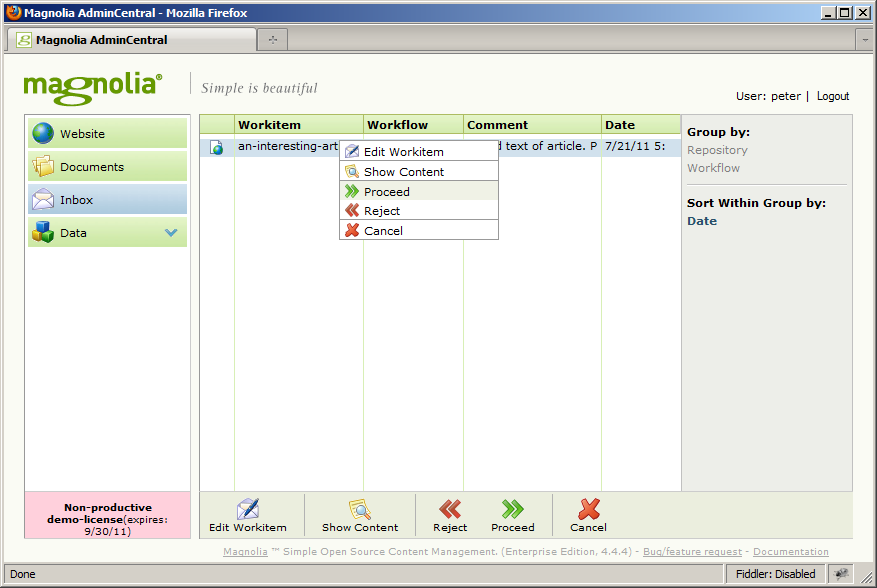
Log out of Admin Central using the link in the top right and then log in as Peter using the username peter and the password peter. On logging in, select the “Inbox” option in Admin Central and see that Peter has received a notification in his inbox informing him of the changes made by Eric.
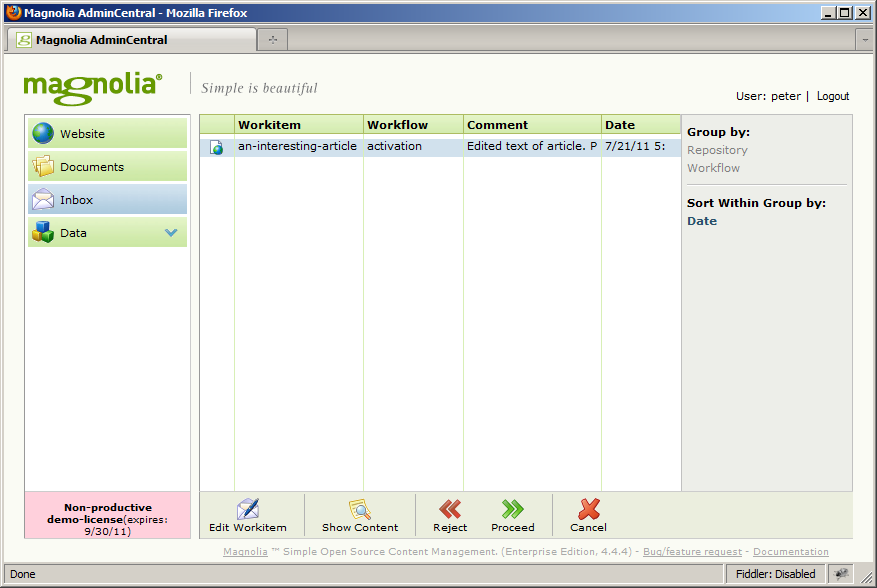
Double click on the inbox entry to open it and select the Workitem tab at the top of the page.

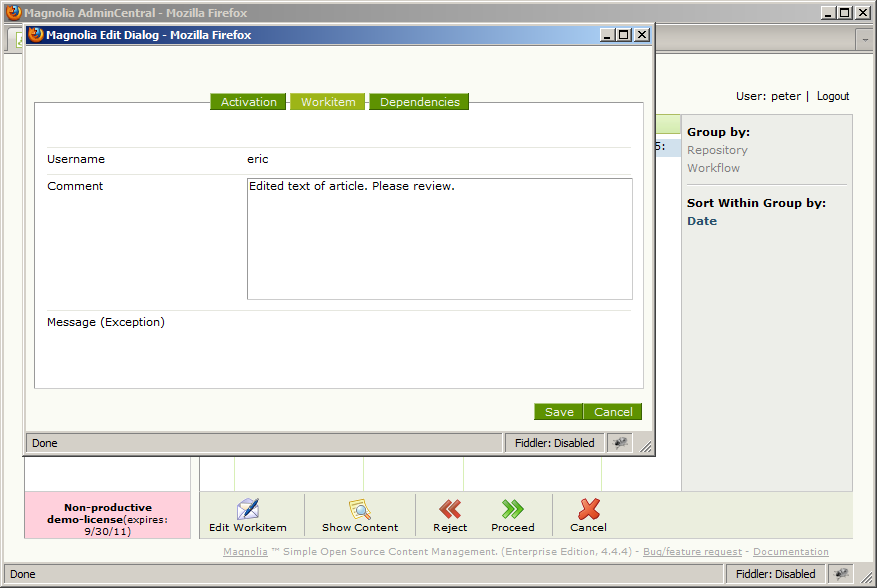
You will see the comment you left when activating the change made as Eric.
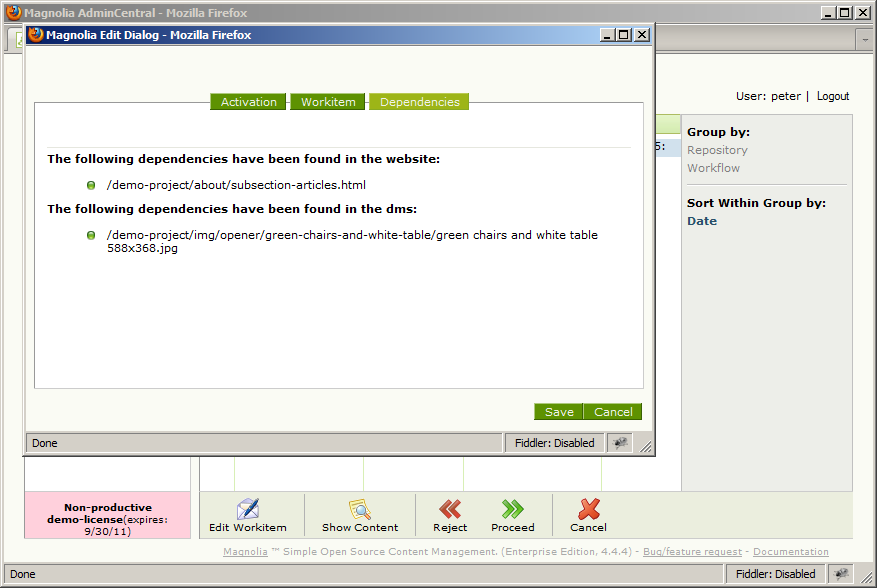
As well as this note, Magnolia can pinpoint the position of the page within the tree under the Activation tab:
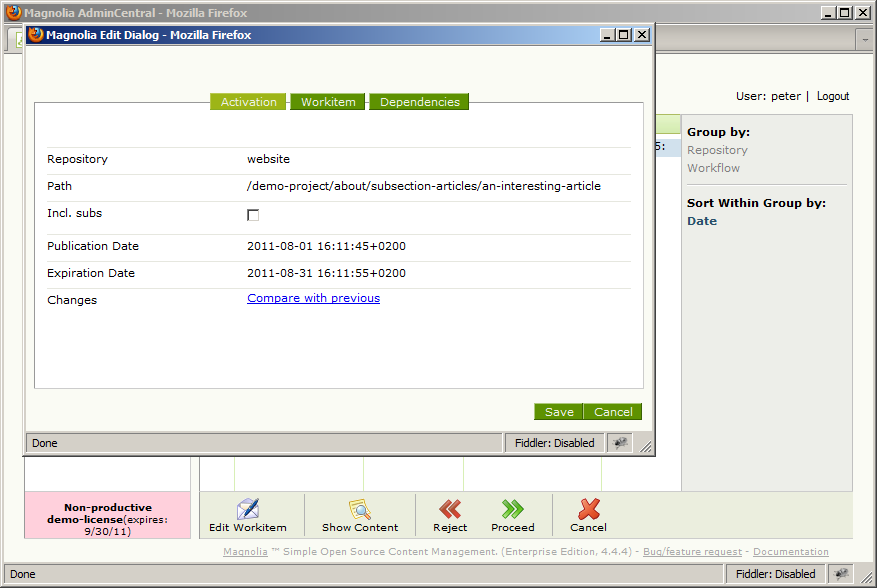
Magnolia can also identify any dependencies on this page under the Dependencies tab. Because you only made one change, the dependencies shown have green lights to show that they are in the same state as before. The second dependency below is a .jpg image used in the article. If you had updated the image it would have a yellow light next to it as seen previously.
Close this dialog with the “Cancel” button and re-open the context menu by right-clicking on the inbox entry.
To see on screen the effect of the change select “Show Content”. This will launch the interesting article in preview mode with the change applied.
Approve
Now that you have seen the change and are sure that it is correct, it can be approved and published.
Close the window or tab that contains the page in preview mode so that you are returned to Admin Central. From there, right-click on the inbox item again.
When a publisher is unhappy with the changes made, they have the option to now select “Reject”. This would return the changes to the editing user that made them along with another comment describing what is incorrect.
In this example, however, the changes are correct so select “Proceed” from the menu.
With the change approved it is removed from the inbox and Magnolia takes care of publishing the item to all the site’s public instances where it will appear for public viewing.
View
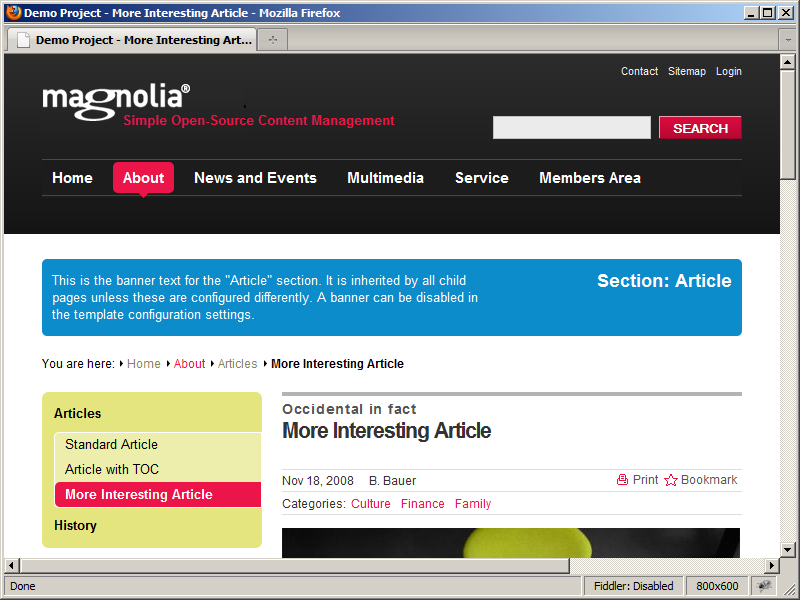
The publishing process should happen almost instantly so return to the public instance and view the interesting article:
The article should now be updated to include the change to the title. If it is not updated then try reloading the page after a minute has passed.
Hello there! Do you know if they make any plugins to assist with SEO? I’m trying to get my blog to rank for some targeted keywords but I’m not seeing very good results. If you know of any please share. Thanks!
Hello Marjorie.
I do not know of any module that will automatically optimise your site but Magnolia have produced a guide to SEO that you might find useful.
You can download the guide as a PDF from http://www.magnolia-cms.com/ .
I hope this helps you,
Chris.